Monday, August 21, 2017

Create a first Hello World app with Android Studio

This post shows how to create a first Android "Hello World!" app with Android Studio. The version of Android Studio is 2.3.3. (August 17, 2017)

After installing Android Studio for Mac, create a first project called Hello.

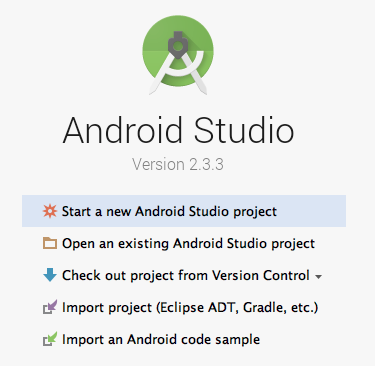
1. Create and a new project.

Select "Start a new Android Studio project".

 Keep the default SDK setting and select "Next".


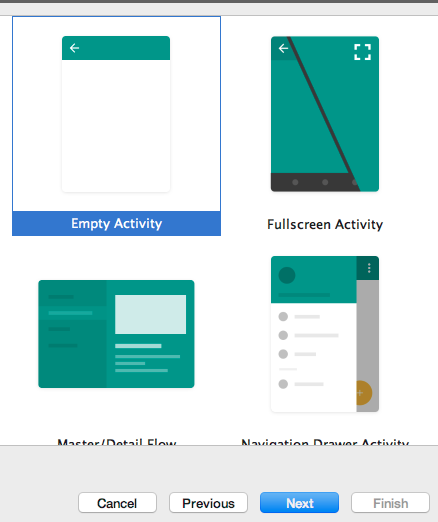
Select "Empty Activity" and "Next".

In the Customize the Activity page, select "Finish".

You should see a new project like this:


2. Settings on a physical device (phone/tablet).

On the device, select Settings -> Developer options.
If this option is not shown, select Settings -> About phone. Tap "Build number" 7 times to enable the Developer option.

Note: The options under settings page may be different for each Android phone. Please search for the settings of your phone model.

Enable "USB debugging" under "Developer options".

3. Run the project on a device.
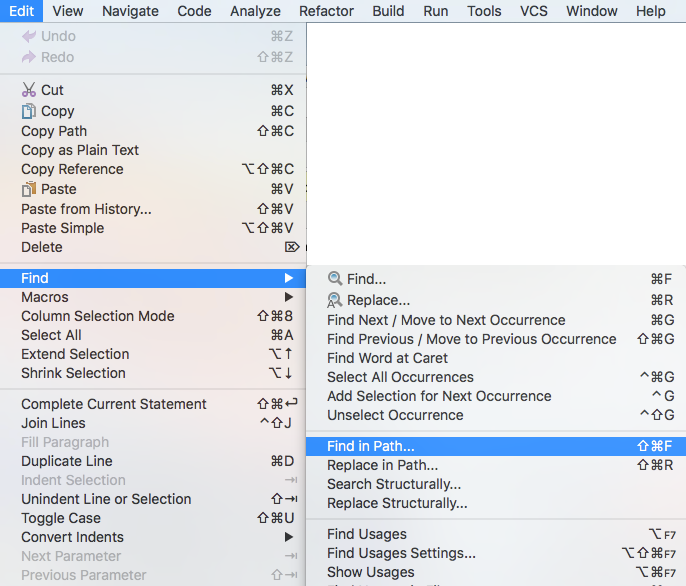
Select the button.

Select the device and press OK.


Select "Install and Continue" if the installation is required.


After installation, the Hello World app should run on the device.

Result: 


Reference:

Building Your First App (Android Developer)

Tuesday, May 10, 2016

How to search for a string in Android Studio

To find a string in the Android Studio (OS X version), either of these two methods works:

1. Press [command] + [shift] + [F]

2. Select Edit -> Find -> Find in Path...


Monday, April 20, 2015

Flashlight / Torch function using Camera instead of Camera2 in the Android 5.0 environment

1. Edit the AndroidManifest.xml file at app/src/main/res/AndroidManifest.xml:

<?xml version="1.0" encoding="utf-8"?>
<manifest xmlns:android="http://schemas.android.com/apk/res/android"
    package="com.example.kiosk.torch" >
    <uses-permission android:name="android.permission.CAMERA" />
    <application
        android:allowBackup="true"
        android:icon="@mipmap/ic_launcher"
        android:label="@string/app_name"
        android:theme="@style/AppTheme" >
        <activity
            android:name=".MainActivity"
            android:label="@string/app_name" >
            <intent-filter>
                <action android:name="android.intent.action.MAIN" />

                <category android:name="android.intent.category.LAUNCHER" />
            </intent-filter>
        </activity>
    </application>

</manifest>

Note: Since the uses-permission has been modified, please ignore the warning that camera has been deprecated in Android 5.0 or above.

2. Edit MainActivity.java as below:

package com.example.kiosk.torch;

import android.content.pm.PackageManager;
import android.hardware.Camera;
import android.hardware.Camera.Parameters;
import android.os.Bundle;
import android.support.v7.app.ActionBarActivity;
import android.util.Log;
import android.view.Menu;
import android.view.MenuItem;
import android.widget.CompoundButton;
import android.widget.Toast;
import android.widget.ToggleButton;

import static android.widget.ToggleButton.OnCheckedChangeListener;


public class MainActivity extends ActionBarActivity {

    ToggleButton myToggleButton;
    private Camera myCamera;
    Parameters myParams;

    @Override
    protected void onCreate(Bundle savedInstanceState) {
        super.onCreate(savedInstanceState);
        setContentView(R.layout.activity_main);

        if(getApplicationContext().getPackageManager().hasSystemFeature(PackageManager.FEATURE_CAMERA_FLASH))
        {
            Toast.makeText(getApplicationContext(), "Flash Detected!!", Toast.LENGTH_LONG).show();
            try {
                myCamera = Camera.open();
                myParams = myCamera.getParameters();
            } catch (RuntimeException e) {
                Log.e("Camera error: ", e.getMessage());
            }
        }
        else
        {
            Toast.makeText(getApplicationContext(), "No Flash Detected!!", Toast.LENGTH_LONG).show();
        }

        if ((myCamera == null) || (myParams == null)) {
            return;
        }

        myToggleButton = (ToggleButton)findViewById(R.id.toggleButton);

        myToggleButton.setOnCheckedChangeListener(new OnCheckedChangeListener() {
            @Override
            public void onCheckedChanged(CompoundButton buttonView, boolean isChecked) {
                if (isChecked) {
                    myParams.setFlashMode(Parameters.FLASH_MODE_TORCH);
                } else {
                    myParams.setFlashMode(Parameters.FLASH_MODE_OFF);
                }
                myCamera.setParameters(myParams);
                myCamera.startPreview();
            }
        });
    }

========================

Saturday, April 18, 2015

ToggleButton

1. Drag a toggle button to activity_main.xml and the XML code becomes:

    <ToggleButton
        android:layout_width="wrap_content"
        android:layout_height="wrap_content"
        android:text="New ToggleButton"
        android:id="@+id/toggleButton"
        android:layout_below="@+id/textView"
        android:layout_alignParentLeft="true"
        android:layout_alignParentStart="true"
        android:layout_marginTop="35dp"
        android:checked="false" />

2. Write the code as below to inform the user the toggle button is ON/OFF with toast:

package com.example.kiosk.togglebutton;

import android.os.Bundle;
import android.support.v7.app.ActionBarActivity;
import android.view.Menu;
import android.view.MenuItem;
import android.widget.CompoundButton;
import android.widget.Toast;
import android.widget.ToggleButton;

import static android.widget.ToggleButton.*;


public class MainActivity extends ActionBarActivity {

    ToggleButton myToggleButton;

    @Override
    protected void onCreate(Bundle savedInstanceState) {
        super.onCreate(savedInstanceState);
        setContentView(R.layout.activity_main);

        myToggleButton = (ToggleButton)findViewById(R.id.toggleButton);

        myToggleButton.setOnCheckedChangeListener(new OnCheckedChangeListener() {
            @Override
            public void onCheckedChanged(CompoundButton buttonView, boolean isChecked) {
                if (isChecked) {
                    Toast.makeText(getApplicationContext(), "ON!!", Toast.LENGTH_LONG).show();
                } else {
                    Toast.makeText(getApplicationContext(), "OFF!!", Toast.LENGTH_LONG).show();
                }
            }
        });
    }

============================
Toggle Button in iOS Swift

Thursday, April 9, 2015

How to remove Android Studio?

In case that you want to remove and reinstall Android Studio, you may try these steps:

1. Open the terminal. (Click the spotlight search / magnifying glass icon at the upper right corner of the screen)

2. Type in commands in the link.

Note 1. You may type a few letters such as rm ~/L and hit the tab button, then you'll see the content of the terminal becomes rm ~/Library/

Note 2. Wait patiently if your mac takes a while to run the below deletion command:


rm -Rf ~/Library/Android*

3. Install the Android Studio again. See the instructions.


Tuesday, January 20, 2015

How to enable smartphone debugging mode/development option

  • Enable USB debugging on your device.
    • On most devices running Android 3.2 or older, you can find the option under Settings > Applications > Development.
    • On Android 4.0 and newer, it's in Settings > Developer options.
      Note: On Android 4.2 and newerDeveloper options is hidden by default. To make it available, go to Settings > About phone and tap Build number seven times. Return to the previous screen to find Developer options.
Android 4.2以上版本
在Build numer選項按七下以打開開發人員選項

source: